Showing posts with label healthy turf. Show all posts

Saturday, May 5, 2018

Fairway Aeration - Success!

So yes, we delayed fairway aeration due to the persistent wet weather.  Was that a good decision? You bet! We had perfect weather the last week of April and here's some pictures which show just how well the process went.  
Check out the gorgeous sunshine as we're pulling cores around the 18th teeing grounds.  Okay I keep calling them fairways but really since our fairways and teeing grounds are all connected it's hard to distinguish between fairway and the other short grass areas like tees and approaches.  We treat all the short grass the same and we call all the short grass the "fine turf".
The machine we used to punch the holes is brand new and we just acquired it a few weeks ago.  The main reason for getting this new machine is that it simply is amazing compared to other aerifiers.  It is super fast and the cores come out of the ground in fragments.  Check out this close up of the turf right after this machine has done it's thing.
You can see there is quite a bit of soil brought to the surface.  That's really the whole idea.  Bringing up soil and then returning it back into the turf canopy is what in turn makes for a healthy stand of turf.  Yes punching holes and getting air into the surface is important and yes punching holes for better infiltration of water is nice too, but in my opinion it's the recycling of the soil that is the key here.  When soil is recycled there is nutrients and micro organisms that are turned over and this is where the power of nature takes over.  For centuries the "turning over" of soil has been known to be important for growing healthy plants.  We're getting back to the basics by pulling cores and it's working.  Our fine turf is now much healthier and our summer diseases like fairy ring are much more manageable. 
After punching the fine turf and letting the surface dry out a little, we drag the areas with a harrow mat.  This breaks up the soil and knocks it down into the turf canopy.
In this picture you can see the difference between an area that has been drug with the mat and an area that has not.  Pretty cool huh?
The last step is to now pick up that little turf plug which is left behind.  It helps to condense them by blowing them into long rows.
This marvelous time saving machine gathers them up and now we're done.  Waiting for the good weather, and having the new punching machine made this the most successful fairway aerification I've ever seen.  Thank you for your patience. The result is some pretty gorgeous fine turf.  Hope you're enjoying it today.

Wednesday, October 26, 2016

Sunlight and Air

I took a couple of pictures last Friday which clearly show the amazing power of sunlight and air.  The picture above is of the back of #2 green and if you've been a member at Tacoma for any time at all then you know just how good this area is today versus its condition in the past.  Here's another picture of this area taken from the 3rd tee.
In the last week it has rained over 5.5 inches.  That's a lot of rain but we were still able to mow this area on the back of #2.  Not only is the area firm enough to mow, the quality of the turf is as good as any area on the golf course.  Just a few years ago the back of #2 green might have been considered the worst conditioned area on the course.  So what happened? Why the dramatic turnaround?  It's pretty simple.  All we did was introduce sunlight and air to this area by strategicaly removing trees.  Starting back in 2009, we removed a couple trees behind this green and since then we have been removing more trees every other year. Today we finally have the amount of sunlight required to grow exceptional turfgrass in this area.  If you haven't been behind #2 lately, I encourage you go back there and check it out. It really is incredible what a difference it makes when you have adequate sunlight and air.  If you can't remember how bad it used to be behind #2, then go look at the area behind #3.
Here's #3 and you can see just how dense the treescape is behind that putting green. Here's a picture of the area on the back of this green.
You can see that when we attempted to mow this area, the machines rutted and scalped the turf.  Because of the lack of sunlight and air flow, this area is squishy and thin.  This is simply not okay and one of the main reasons several trees behind the third green are marked for removal.  These trees will be removed before the upcoming growing season so it's good to know that this poor turf condition is temporary and before you know it, this area behind #3 will be just as good as the area behind #2.  

Monday, September 12, 2016

Trees and Disease

It was just a gorgeous morning today as we started our fall aeration on greens.  This picture is showing the sand application to #3 green.  Yes it's pretty dusty and that's because we're using dried sand.  Normally the sand has some moisture to it and it doesn't look this dusty. While I was standing on the green taking this picture I also took some pictures of the disease popping up on the back of #3 green.  Look here.
This disease is called Fusarium Patch and it is very common in the Pacific Northwest on Poa greens.  Here's another picture I took this morning of Fusarium Patch, but this was taken on the back of #4 green.  
You might be thinking these disease spots are really small and no big deal.  That's only true because we noticed this disease coming on early last week when the weather cooled down and so we immediately applied a plant protection product to stop the infection.  If we had not made that application, there would be significant turf loss in these areas.  So why do these areas have disease popping up and other areas do not?  That's pretty simple and I'm sure you can tell by looking at these pictures that these areas are surrounded by trees.  No, I'm not saying trees cause disease.  It's always disease pathogens that cause disease, but a plants natural defense mechanism cannot work well when the plant suffers from shade. Trees cause the shade which weakens the plant and then the plant becomes susceptible to disease.  In addition, trees restrict air flow and that makes the environment in these shady areas more conducive to disease.  So now you have grass plants weakened from shade living in an environment that has more disease pressure.  To make things worse, if you loose turf to disease in these areas, it takes forever for the turf to recover since the turf in these areas are weekend by the shade.  It's the perfect storm really.  Shade is an absolute killer on a golf course.  Selectively removing trees is the most logical solution since it will both improve the environment and improve the plants health. 
Right now there are 36 trees on the golf course that are marked with orange ribbon because they are scheduled to be removed this off-season per the Club's Tree Management Plan. Some of these trees are being removed because they compete for sunlight and are compromising the quality of the golf course.  Some of these trees are being removed because they are simply in the way of golf and so they also are compromising the quality of the golf course. If you would like more information on the reasons surrounding the removal of these trees, click HERE to download this years project summary.   By the way, disease incidence is only the tip of the iceberg when it comes to the true cost of trees.  For a realistic picture of what a tree really costs, this article is always a good read, click HERE.

Friday, August 12, 2016

Some Great Golf.....On Okay Greens

 We've had some great golf these past few weeks.  The Member Guest Invitational was very memorable.  We had absolutely perfect weather.  The flop wall competition and skills challenge was fun as always. 
The Travis Mathews bus was here providing a great shopping opportunity and a really cool hang out spot.
 
 Jamie of course went completely over the top with the food.  I honestly don't think anyone can come close to matching his ability.  
And then there was the emotional award ceremony when we said goodbye to Rich Friend.  Rich has been the Golf Professional for the past 27 years and my friend for the past 23.   Tears were shed by everyone as we mourned his departure and celebrated his amazing service to the Club.  I will never forget that affectionate sendoff and I wish Rich the best on his new adventure.
 Then this week the Club hosted the 90th Washington State Men's Amateur.  On the 60th hole following a 6 hole playoff our very own Chase Carlson secured the win.  It was a fantastic event and the first men's championship held at the Club since the 1998 Washington Open.  Before the new teeing grounds were built during the recent award winning renovation of the golf course, Tacoma simply didn't have the length to challenge today's long hitters.  Now the course has teeth again and the expansive teeing grounds also provided some interesting options for the tournament coordinators.  Check out this picture of the setup on the final day of the Men's Amateur.
  The 7th hole was played from the 17th tee at over 420 yards.  That's 31 yards longer than the rated black tee for number 7.  To see more pictures of the event click HERE and check out the WSGA facebook page.  Click HERE to go to the WSGA website and see all the details of the event.  
The golf has been amazing these past few weeks but unfortunately the golf course has not. Sure it may look good and the greens have been very fast but with each season our frustration increases because so does the shade.  Above is a picture of #4 green and notice that the back of the green is in total shade.  Notice also that the shadows are very short as the sun is virtually straight up above when this picture was taken.  The back half of this green receives virtually little to no direct sunlight and this makes maintaining tournament quality firmness impossible.  

We monitor moisture in the greens with this device.  In the picture below notice the reading shows 25.7% water content.  That's a little high but at the time we took this reading we were setting up for a 90 degree day.  We prefer to keep the moisture at about 18-20% for good firmness and that's adequate moisture to get through a normal day of 75-80 degrees.  
Now check out the reading of the moisture content of the back half of the green which is always in the shade.  Yes that says 40%.


Keep in mind that these readings are being taken after we already have taken steps to dry down the back half of the green.  For example, the sprinklers on the back half of #4 have been changed to part circles which means they aren't even spraying water on the back half of the green.  We do this by changing out the internal motors of the sprinklers.  This of course takes time and constant monitoring. Even still that half of the green will just not dry down due to all the shade.

The fourth green is not our only problem area.  Look at these aerial images.  The first picture is of #4, the second is of #3 and the third picture is of #11.


Excessive shade is a constant problem and one that is only getting worse as the fir trees at Tacoma are not done growing.  The shade is increasing with each season and so are the expectations for good, consistent putting surfaces.  
On the bright side, check out this picture of #2 green taken mid day with the sun straight up.  The putting surface now receives adequate sunlight since we removed those three fir trees behind the green last winter.  We used to have the same problem with excessive moisture on #2 but not any more.  Of course moisture is not just about firmness and how the ball bounces on a green.  It's also about smoothness.  When the surface has too much moisture, foot traffic can make for terrible smoothness by days end.  If your as worried about this shade problem as I am, then worry no more.  The Club's Tree Management Plan addresses the need for sun on greens 3, 4, and 11 and there will be some thinning of the trees this upcoming off season.  There is also plans to improve the quantity of sunlight for the 18th green but this involves morning light which is the best light.  Check out this picture of #18 at noon on a sunny August day.

Because of the trees northeast and east of this green, the back right corner never receives any morning light.  It receives adequate afternoon light to maintain turf coverage but Tacoma has higher standards than just turf coverage.  In order for this green to have good putting quality and consistency, some morning light is essential.  Only two trees will be removed to correct this problem.  I know tree removal is an emotional issue for some people but rest assured the Club is using the best professional council regarding these agronomic challenges and making Tacoma the best it can be is the Committee's prime directive.  

Saturday, August 15, 2015

Solid is looking Solid

A recent publication contained an article written about some golf course superintendents who have switched from core aeration to solid tine aeration.  You can read that article by clicking HERE.  I am one of those superintendents and now that I've been experimenting with solid tines for a couple of years, I am becoming a believer that this method may be viable for the long term.
In my hand is a solid tine on the left and a hollow tine on the right.  The solid tine punches a hole and the hollow tine makes a hole by extracting a core.  Intuitively, one might think that it's best to remove some material from the putting green with a hollow tine and replace it by backfilling the hole with sand.  That process of hollow tine aeration has become standard procedure for many golf courses and I myself have been doing it ever since I've been given the responsibility of managing putting surfaces.  Today, however, I question this practice and I now challenge the thought that it is always the best way to manage a putting surface. Today I'm exclusively using solid tines and in this blog post I will share some my thoughts which lead me to believe solid tine aeration is actually more beneficial than hollow tine aeration.  First let me say that for us, when we switched to solid tines, we needed to apply almost double the amount of sand to the greens in order to fill the holes versus when we used hollow tines.  So although we aren't removing any organic matter, we are doing a lot more to dilute it by using the solid tines.

This is my friend Jason taking a core sample from the 15th green at Tacoma.  He is authorized to take samples for testing by the International Sports Turf Research Center (ISTRC).  Since 2009 I have been taking samples annually from the same greens in order to test them at ISTRC.  The soil test by ISTRC is simply the best if you're looking for an analysis of your soils physical properties.  The sample taken is a couple inches in diameter and 4 inches deep.  That sample of soil is broken down into 4 one inch thick sections and each section is then evaluated.  Below is an example of the data you get from ISTRC.

Here is a close up of the data chart from our most recent test and I put a red box around the numbers I find most interesting. 

Notice the percentage of organic content decreased in the top two inches from 2014 to 2015.  This is exactly what I was hoping for.  We haven't pulled a core in a couple years and yet organic matter decreased.   If you look at the chart closely, you'll see that organic content increased in the top inch from 2013 to 2014.  I admit that at that point I was a little concerned that the solid tine method was not going to work long term.  I knew however that the ISTRC test produces some interesting variances so I didn't panic and kept solid tine aeration in place to see how it would perform over a long period of time.  Sure enough, today's test results show that statistically a solid tine aeration program might be solid.  Okay, this chart just shows the results on one green.  Maybe there is an error in the testing method or maybe the normal variance in data means we shouldn't make too much of this one test.  That is true but here's the data chart for the 15th green which I've been annually testing since 2011. 
Again you'll notice that in the top inch the organic matter % increased from 2013 to 2014, but from 2014 to 2015, the organic matter % decreased even though we never pulled a core.   Now if any of you are looking close at these two charts, you may see a couple red flags.  The infiltration rate numbers are very low, but if you look at the history of infiltration rate, you'll notice that it varies a lot.  Air porosity is also low but it doesn't seem critical.  These are things that we will have to watch as we go forward.  What I can say is the greens are performing better than ever and today we now know that with solid aeration, we can effectively manage organic matter content.  So how is this happening?  How can organic matter decrease when we haven't removed any for several years now.  How is this explained?  Well........to put it simply........it's not simply explained.  There is more to this than just diluting the organic matter content with sand through solid tine aeration.  I believe our change in other practices are helping this process work for us.  To premise the next couple thoughts, watch this video by clicking HERE.  What I love about this commercial is it says what I've been slowly learning myself.  It's really hard to control the golf course. I'm starting to realize that when it comes to putting greens, less is more when less is done properly.  For example years ago I found myself purchasing very expensive products to spray on the greens which used hormones to stimulate a response in the turf. These are called bio stimulants and they're like steroids for turf.  Years ago I thought this was really cool technology.  I don't anymore.  Check out this photo.


The root system on the left is one from a plant treated with a bio stimulant while the root system on the right is from a plant not treated with a bio stimulant.  You certainly can argue that the products work.  My argument is why is this considered good.  Why are so many turf managers trying to increase root mass.  Personally, I would rather manage the turf on the right.  It has equal rooting depth to the plant on the left.  I agree that rooting depth is important.   But I'm not sure I want to provide the amount of input necessary for the turf on the left to be happy.  Think about how much more input is necessary to support that huge root mass.  And if you didn't provide enough input, the turf would look lean and then the huge root mass would actually be a burden on the plant and thus a stress. Core aeration also increases root mass.  Punching a hole with a hollow tine shears roots.  The sheared roots response is to produce more roots and the plant goes into recovery mode because it is under stress.  Recovery mode means the plant tries to grow and recover from injury.  This growth response would be a stress without providing adequate nitrogen to the plant during this time.  Increasing nitrogen to support this growth and increased root mass just increases the need for aggressive thatch management practices like more core aeration.  It's really just a crazy cycle which I no longer think is a sustainable way to manage putting surfaces.  My whole thing lately has been to eliminate stress and therefore eliminate the plants growth response to stress and therefore the need for more input.  Years ago I stopped spraying bio stimulants and switched to a carbon based fertilizer program.  By doing so I've dramatically reduced the need for nitrogen.   The carbon based program increases the soils biology and things work more like they do in mother nature.  We see plants growing all around us in nature and no one is giving them nitrogen.  Once I started to feed the greens this way, I've never felt like they looked lean to me so I don't feel the need for very much nitrogen.  After all, green speed is so important that the last thing I want is for the greens to be actively growing.  So this type of fertility program is a perfect partner to the solid tine aeration program and what I mean when I say less is more when done properly.  Part of it is doing less things that give the greens reason to need nitrogen.  The other part is using more sand.  Solid tines allow us to get more sand into the surface of the greens.  What we're doing might not work for everyone but I know it's working for us.  This has been by far the most stressful summer we've ever had and not once have we had a day where the greens looked stressed.   I have no thoughts of going back to the crazy cycle of stress'em then feed'em.  
LESS STRESS - LESS NITROGEN - MORE SAND - MORE CARBON  
Right now thats looking pretty solid.

Friday, February 20, 2015

Root Pruning


No...........we didn't add irrigation.  No............we didn't install drainage.  The trenches you see around the playing field are the result of "Root Pruning".

Before we began, we marked areas that we wanted to trench with paint.  The path should be straight as opposed to curved in order to keep the trench narrow and minimize disruption.  We targeted our worst areas.  In other words we targeted areas where we have the biggest struggle keeping turf happy in the summer when the heat is on and the trees are competing for water.
My friend Jeff from Greenshields brought his really cool machines out to do the work.  Jeff's expertise is drainage and he uses these machines to install miles of drainage every year.  At Tacoma we have very little need for drainage so I haven't been able to use Jeff's talented staff before.  We recently realized that his stuff is also perfectly suited to efficiently prune roots from the fairways.

You can see that the finished trench is very clean and tidy.
This trench on 13 was the most impressive.  Here we were pruning poplar roots which are very aggressive.  This fairway is so hard to keep green in the summer because of the encroaching poplar roots.  I expect to see a huge improvement here this coming summer.
Look at this pic of the trench we cut on 13.  The density of roots from the poplars is really impressive.
After the trenches were cut, Jeff's guys used the side shooter to backfill the trenches.
Then they put the packer-roller-thingy on the really cool skid-steer and packed the sand into the trenches.  It was really impressive to see how Jeff and his guys did 1500 feet of trench in 8 hours.  What's even more impressive is Jeff says he can double his productivity next time now that we have run through the process this year and figured out ways that we can improve on it.  I'm hoping that we see a huge improvement from the root pruning and that we can just get on a schedule to do a day of pruning each spring.  Here's a cool short video of the process.

Friday, April 13, 2012

Aerification sights and sounds

I know I said in my last post that my next post would be about the master plan but I wanted to share something else real quick.  First of all here is how the back of 7 green turned out after installing the run off run on.


It is really neat and another thing these pictures show is how much sunlight is on the back of #7.  You'll remember there used to be a huge fir on the back of this green.  Back in October we removed the tree since it had simply outgrown its space.  It was seriously shading the green and also competing with the Garry Oak that resides back left of the green complex.  With the tree removed and the run off installed, I must say this is one of my favorite spots on the property right now.  Can't wait to play golf here and decide whether to chip it or putt it.  Anyway, we are in the middle of punching and sanding the golf course.  Actually we are almost done and it happened quickly this year with our new fairway puncher.  Watch the video below to see the new TORO 864 married to the new Kioti DK55.  Everyone knows Kubota is a great tractor but I'm here to tell you the best Orange tractor is the Kioti
This next video is of the core harvester.  The Cushman Core harvester has been around for decades and has changed very little.  We use it on the TORO Workman.  We have one on a Diesel powered rig and one on a gas powered rig.  The newer rigs like ours have high flow hydraulics giving the old core harvester almost more power than it can handle.  These machines work well but I'll tell you they require a lot of attention.  Joe and Jason spend hours preparing these machines for the abuse of fairway aerification.  Let's face it, if you get the weather to punch, you want to get it done quick so break downs are unacceptable.  In this video you'll see Dustin in the back shoveling like a machine.  This is how we do it so the driver can just drive.  With the guy in the back distributing the plugs, the driver can go "non stop" till the bed is full.  This is how one harvester machine can keep up with our new really cool, really fast  TORO 864


So after harvesting the plugs, sand is applied to the fairways.  The next video shows our 1992 Ford 3930 tractor pulling the Tycrop MH400 which spreads the sand.  The Ford is pretty old but for the last several years, all she has done is pull the Tycrop and she does that really well.  Check out Doug topdressing #5 fairway.  Doug is really good at getting a uniform application.

This next video is of a sand delivery.  We apply over 700 tons of sand with each application to the fairways so we get 17+ truck loads of sand delivered.  What you'll see here is only half a load.  We consider the truck and transfer unit one load which is usually about 40 tons.
With decent weather it takes just about a week to punch and sand fairways.  I know it is an inconvenience but I think most of you will agree it is worth it to have the turf quality we have come to expect.  This post was to show that we have some really cool equipment which makes the aerification process fast and somewhat painless.  It also shows how well  the iPhone takes movies.  If it wasn't for my new iPhone, making these movies would take too long and I wouldn't bother sharing this stuff with you.  I took these movies and posted them to youtube all with the iPhone and in just minutes.

Friday, December 30, 2011

Soil Monitoring.......Really cool stuff!

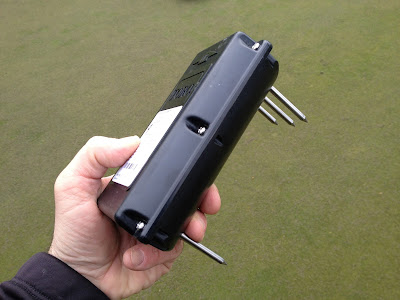
Okay these things are really neat.  What I'm holding in this photo is a sensor that communicates with my office computer and is completely wireless.  It senses the temperature, moisture, and salinity of soil.  So as you can see by the next series of pictures, these things are buried in three of our greens and so now we can monitor growing conditions and therefore make better decisions in regard to our cultural practices (i.e. irrigation, fertility, etc.)  Although I love technology, I must say I grow grass by using visual observations more than any other method to determine the turf's needs.  So initially I felt this type of monitoring would not be very beneficial to me and so I never thought about making the investment.  We recently purchased new irrigation software, which we did need, and that coincidentally made investing in this wireless monitoring technology much more affordable, so I decided to try them out.  To my surprise, they work very well and I am very excited to see how they might assist me over the next growing season.
To install these devices, we first needed to select which greens to monitor and which area of the green to bury the device.  I'm starting with just three sensors so we decided to choose three greens that had very different growing conditions so as to see the widest range of differences.  In other words, I picked green #9 because it is wide open and will therefore have some of the highest soil temperatures.  It is also constructed of native soil and drains rather poorly so I expect to find some of the highest moisture readings on this site.  Another sensor is buried on #3 since it is one of our shadiest greens and should stay cooler on a sunny day.  Number 3 green also drains very well so I expect to see some drier readings in regard to moisture.  The third sensor is buried in green #18 which is kind of an "in betweener".  The 18th green is shaded most of the morning but has adequate sunlight overall and decent drainage.   So as you can see by the picture above, we use the same tool that we use to cut cups for making the hole to install the sensor.  I chose to cut two cup holes right next to each other which gave me a little more room to get my fingers in there and push the sensor probes into the soil.

Here you can see the sensor probes are pushed into the soil and I'm backfilling the hole.
The turf plugs are then replaced.
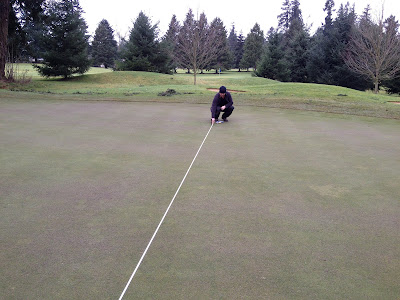
And as you can see I did a decent job of making it look like I was never there.  I forgot to mention that I selected an area on each green that was close enough to the edge of the green that it is very unlikely a person would ever cut a cup there.  This is important since when we cut cups, we usually thrust the cup cutter into the ground with the kind of force that would damage the sensor if it was struck with the cup cutter.  Of course we also need to avoid aerifying this spot since the aerification machine would certainly destroy the sensor.  So we take measurements from two fixed spots to the sensor so that we can find it in the future.  For our fixed spots to measure from we chose sprinkler heads and in the next two pictures you can see how this is done.
FYI, we top-dressed the greens the morning we took these pictures so that is why the turf looks a little grey in color. So now the sensor is installed and all we need to do is set up the antennae to receive the signal.  This is done inside the irrigation pedestals as you can see here.
I have direct communication with each of the irrigation pedestals but really they are only needed to provide power to work the device.  All the communication is done wirelessly from the sensor to the antennae and then to a base unit in my office and then to my office computer.  Okay so now we are ready to start collecting data.
Here is a picture of my computer screen and you can see that there is three sets of data.  The top graph shows moisture in the three greens and as I expected the numbers are higher on our poor draining 9th green which is the center red bar.  The green bars in the middle of the screen show temperature and again the center bar which is the ninth green is higher than the others since it gets much more sunlight.  The bottom purple bars indicate salinity and right now it is completely irrelevant since none of the readings on any of the greens reveal a level of salinity that is alarming.  Given the large amount of rainfall during the winter months, salinity will almost never be an issue.  I imagine in the summer after prolonged irrigation, we might see something interesting with this data so I look forward to July and August.  I also look forward to summer because I think the most useful data will be soil moisture.  During the irrigation season, I expect moisture readings from these sensors will assist us in deciding when to water and how much to water, therefore providing even better more consistent conditions for the golfer.  Either way we now have another tool to help us manage turf and I'm guessing this is just the tip of the iceberg.  Stay in touch with the blog as there will definitely be more posts coming to show what we are learning from the sensors.  This last pic shows some of the cool graphs we can display with the data.  The most interesting trend so far is to see how much temperature fluctuates on the putting surface from hour to hour and day to day.  Stay tuned.........